How to Generate Certificate Signing Request on OS X Yosemite
This article will go into detail on how to generate certificate signing request on OS X Yosemite.
1. Mac OS X Yosemite: Create Your CSR (Certificate Signing Request)
To get a valid SSL Certificate, you must first generate a CSR (certificate signing request). Then, you will use the contents of the CSR to order your SSL Certificate.
Mac OS X Yosemite Server (10.10): How to Generate a CSR Using the Server App
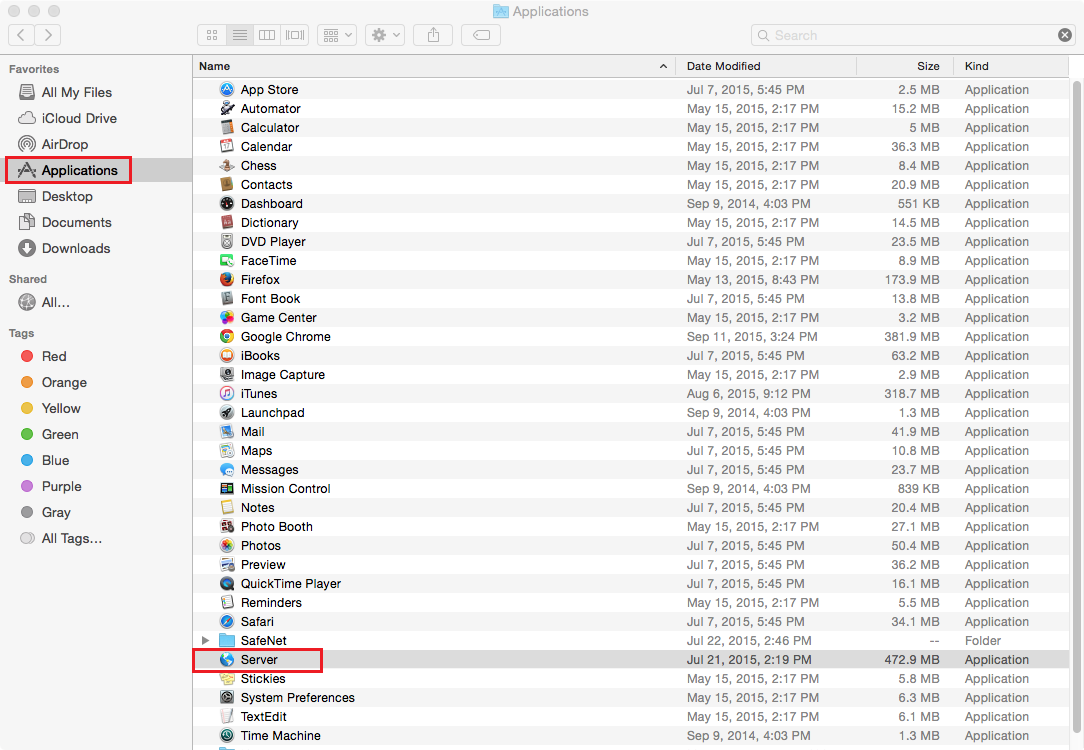
- Open the Server App.
In the Finder window, under Favorites, click Applications and then double-click Server.
- In the Server App window, under Choose a Mac, do one of the following options to select the server on which to create your CSR:
Note: You should select the server on which you are going to eventually install this SSL Certificate.
- To create the CSR on this server
- Select This Mac – YourServerName and then click Continue.
- Enter your Administrator Name and Administrator Password and then click Allow.
- To create the CSR on another server
- Select Other Mac – YourServerName and then click Continue.
- Enter your Host Name/IP Address, your Administrator Name and Administrator Password and then click Allow.

- To create the CSR on this server
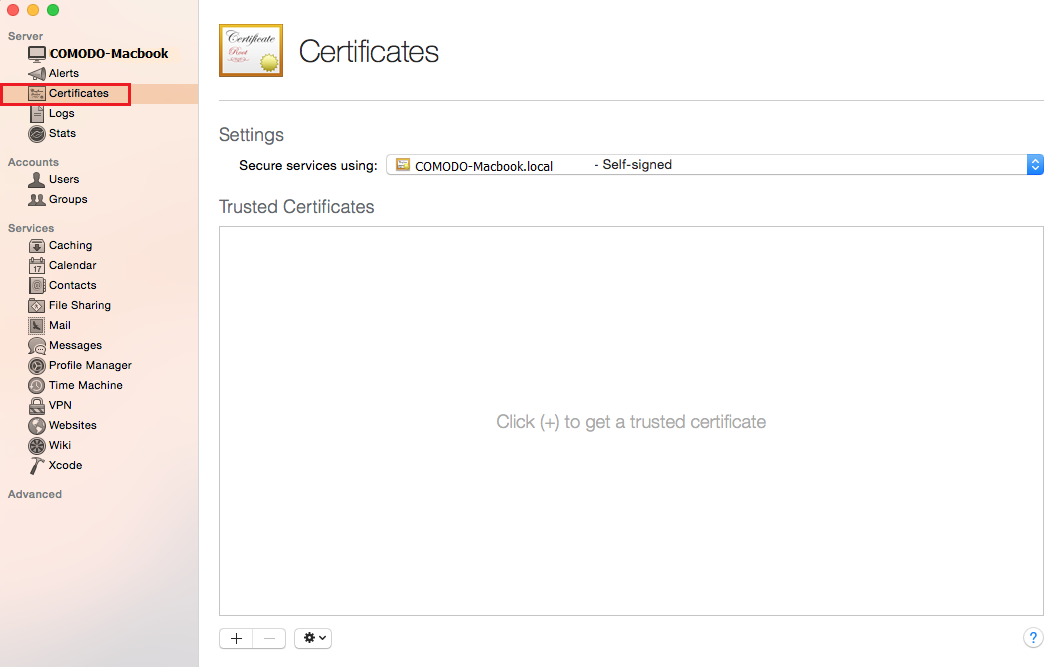
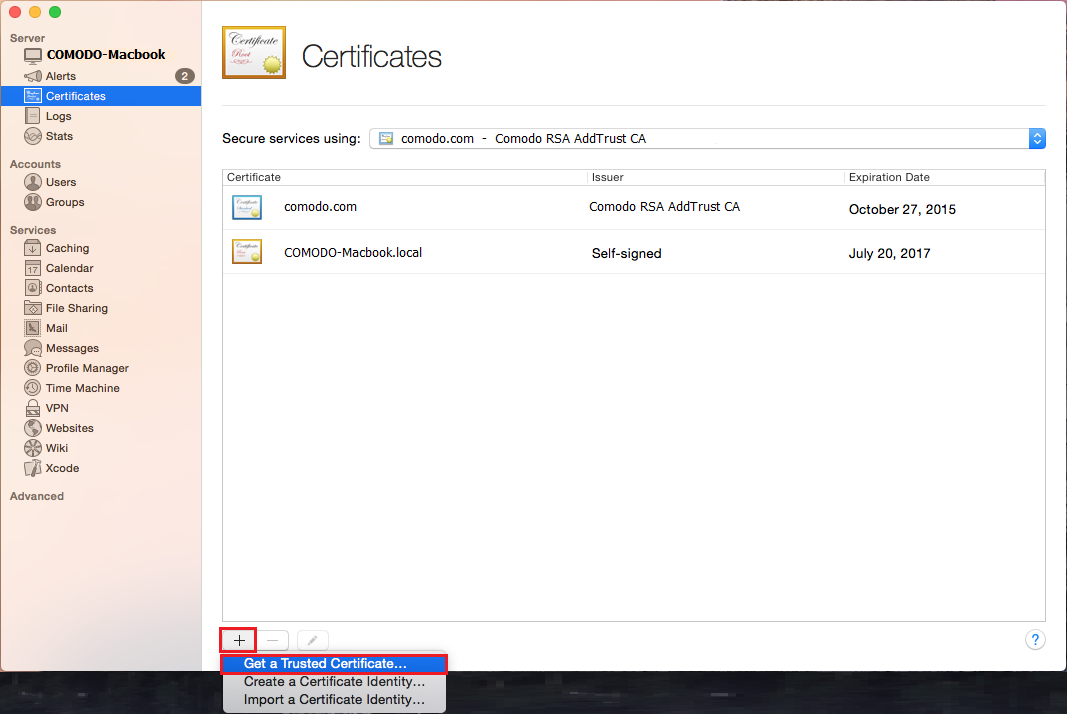
- In the Server App window, under Server, click Certificates.
- On the Certificates page, click + > Get a Trusted Certificate.
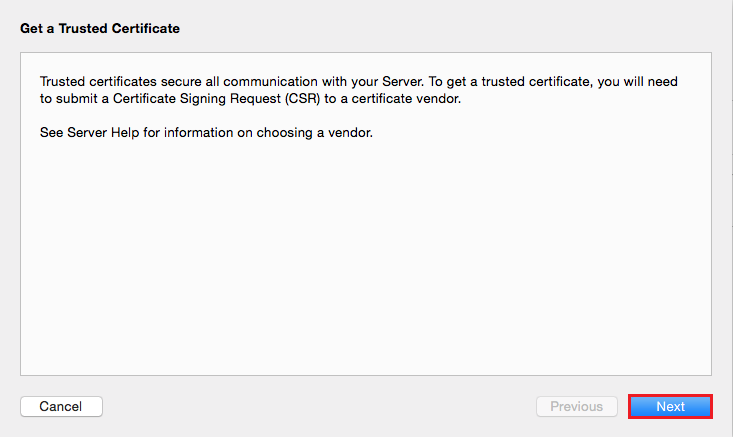
- On the Get a Trusted Certificate page, click Next.
- Enter the following information:
Host Name: Enter the name to be used to access the certificate. This name is usually the fully qualified domain name (FQDN). For example, www.yourdomain.com o... Email Address: Enter an email address at which you can be contacted. Company or Organization: Enter the legally registered name of your organization or company. Department: Enter the name of your department within the organization. For example, you can enter IT or Web Security. Town or City: Enter the town or city where your organization or company is located. State or Province: Enter the state or providence where your organization or company is located. Country: In the drop-down list, select the country where your organization or company is located. 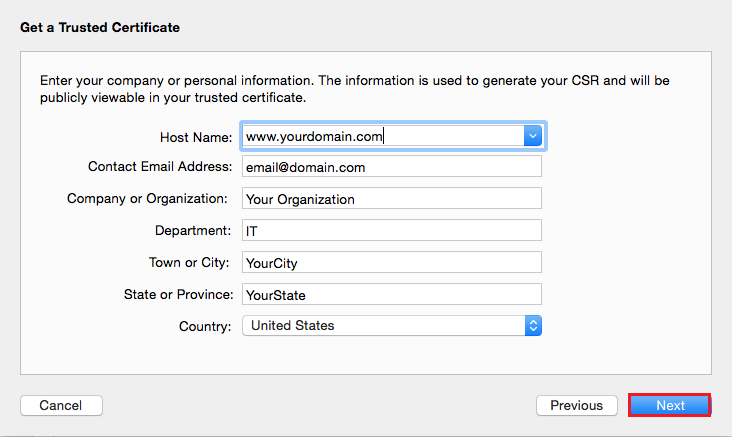
- To generate your CSR, click Next.
- Click Save and save the CSR, making sure to note the filename and location of the file.
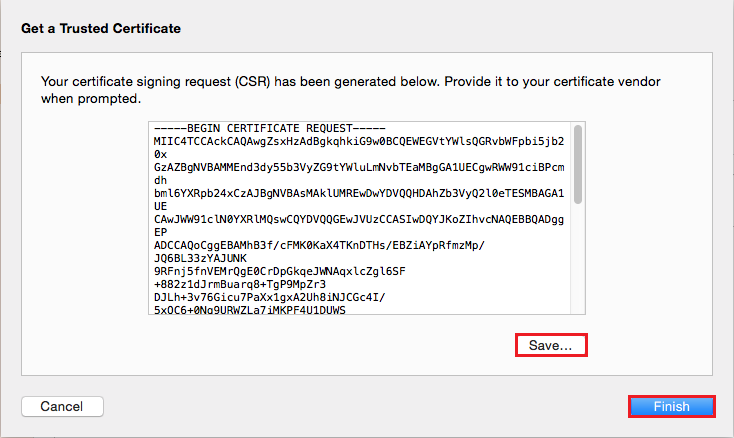
- Click Finish.
- Use a text editor (such as TextEdit) to open the file. Then, copy the text, including the -----BEGIN NEW CERTIFICATE REQUEST----- and -----END NEW CERTIFICATE REQUEST----- tags, and enter it into the order form.
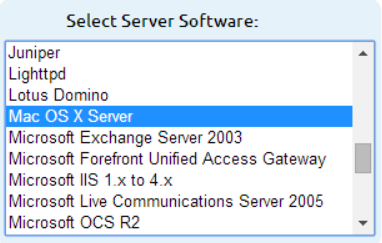
Note: During your SSL Certificate ordering process, make sure that you select Mac OS X Server when asked to Select Server Software. This option ensures that you receive all the required certificates for Mac OS X Yosemite SSL Certificate Installation (Intermediate and SSL Certificates).
- After your receive your SSL Certificate, your can install it.
2. Mac OS X Yosemite: Install Your SSL Certificate
After receiving your SSL Certificate, you first need to install the intermediate certificate on your server. Then, install your SSL Certificate on your server and assign the SSL Certificate to services.
i. Mac OS X Yosemite: How to Install the Intermediate Certificate
- Save the ZIP file your_domain_com.zip onto your server, and extract the SSL Certificate file (your_domain_com.crt) and the Intermediate Certificate file (XYZCA.crt) to a folder.
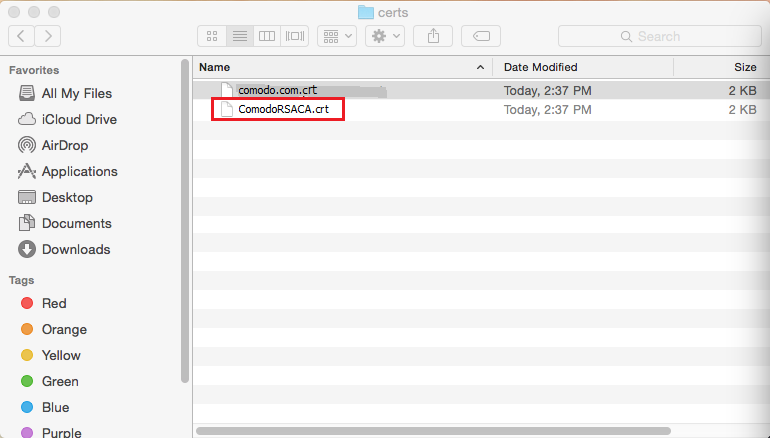
- Double-click XYZCA.crt.
- In the Add Certificates window, in the Keychain drop-down list, select System and then click Add.
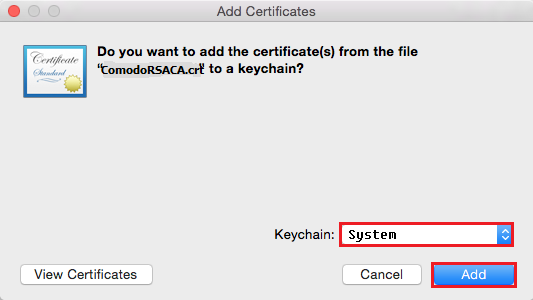
- Enter the administrator's password to authorize the change.
ii. Mac OS X Yosemite: How to Install Your SSL Certificate
- Open the folder containing your SSL Certificate file (yourdomain_com.crt).
Keep this folder open so that you can readily access this file.
- Open the Server App.
In the Finder window, under Favorites, click Applications and then double-click Server.
- In the Server App window, under Choose a Mac, do one of the following options to select the server on which you want to install your SSL Certificate.
- To install the certificate on this server
- Select This Mac – YourServerName and then click Continue.
- Enter your Administrator Name and Administrator Password and then click Allow.
- To install the certificate on another server
- Select Other Mac – YourServerName and then click Continue.
- Enter your Host Name/IP Address, your Administrator Name and Administrator Password and then click Allow.
- To install the certificate on this server
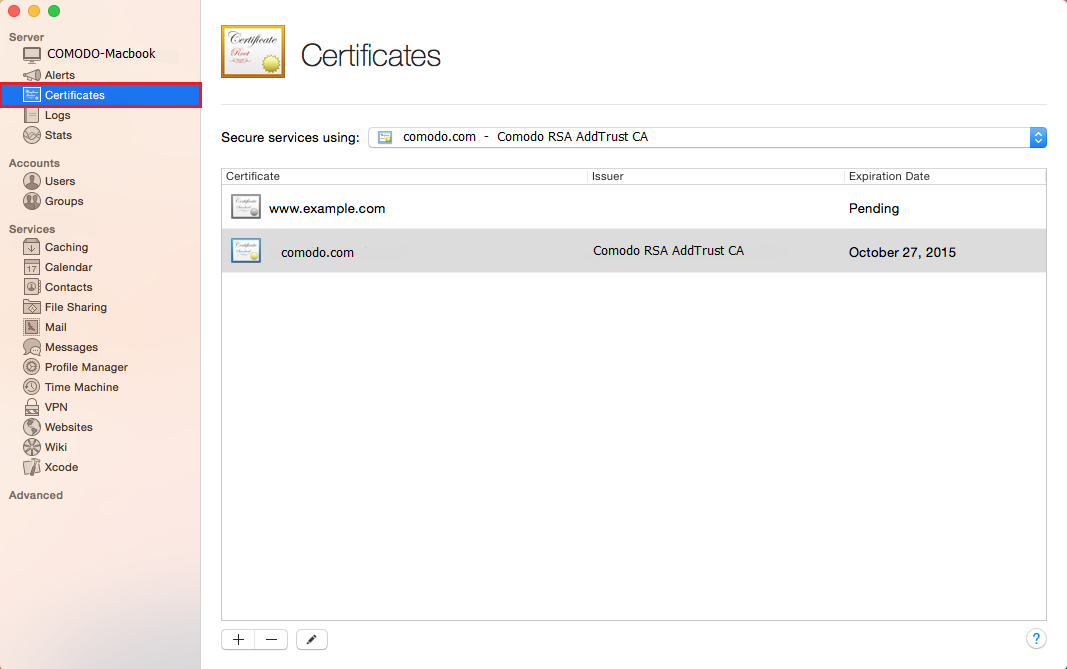
- In the Server App window, under Server, click Certificates.
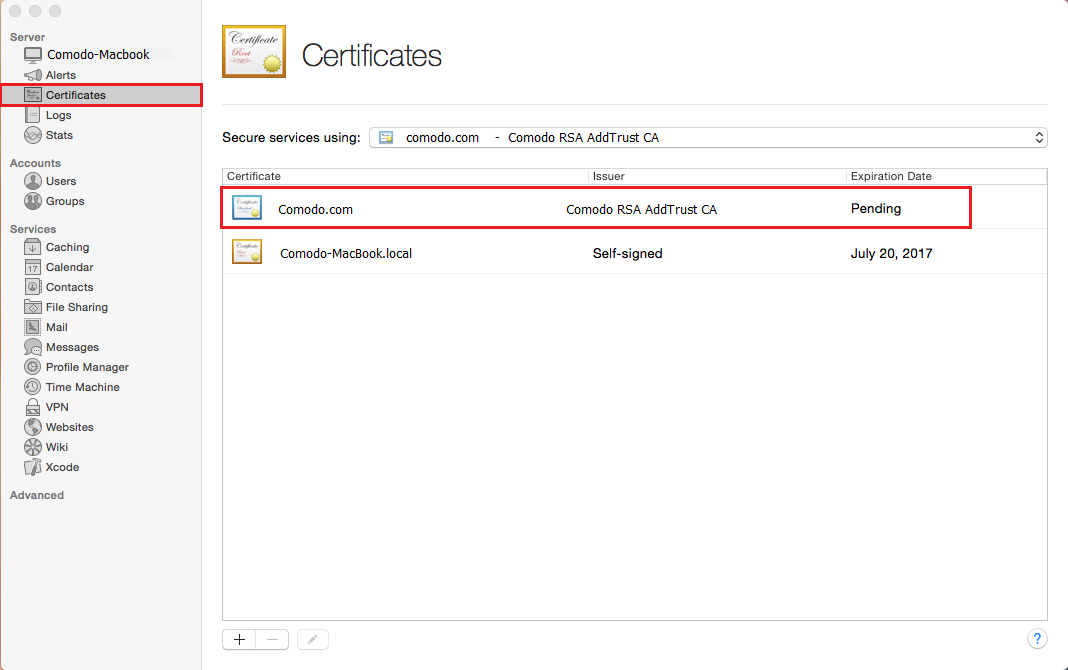
- On the Certificates page, double-click on the Pending certificate that you created when generating the CSR.
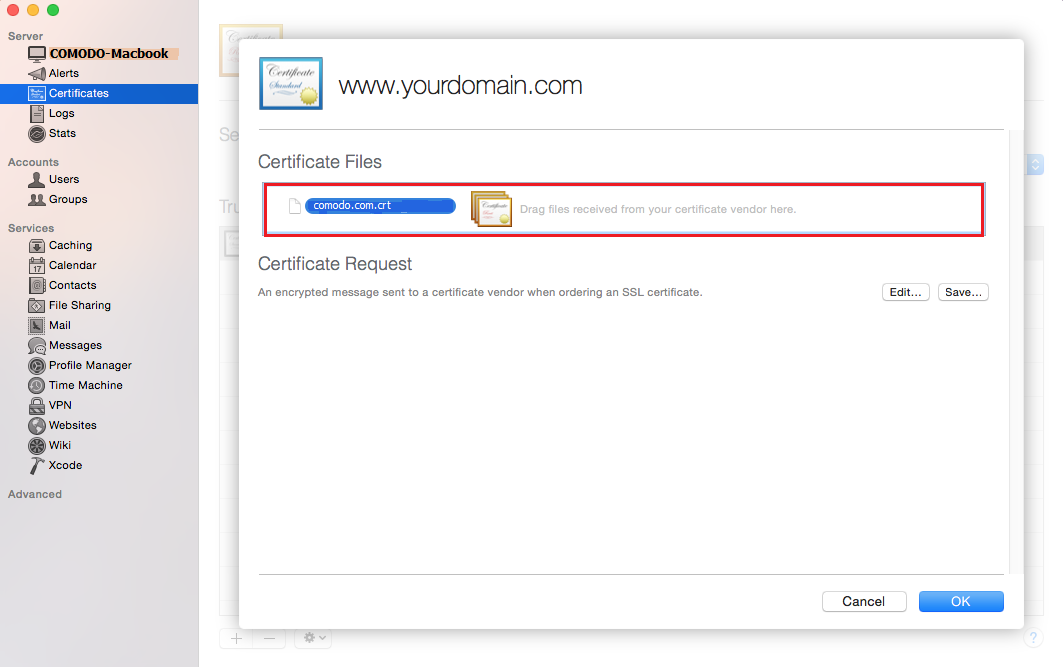
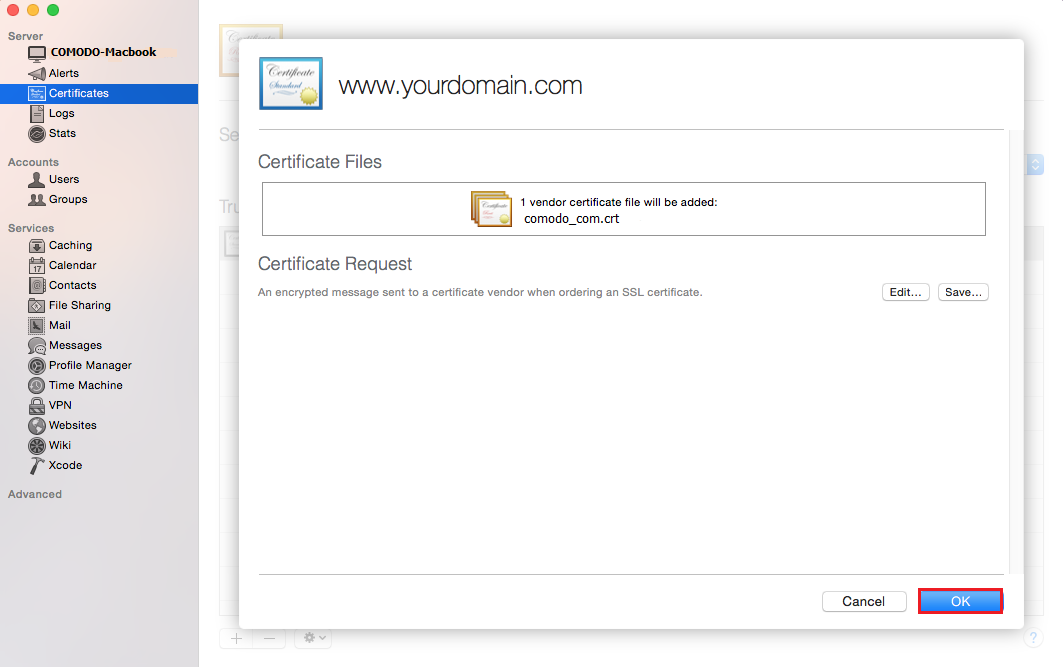
- On your certificate's page (i.e. www.yourdomain.com), under Certificate Files, in the Drag files received from your certificate vendor here box, drag-and-drop your SSL Certificate file (yourdomain_com.crt).

- Click OK.
iii. Mac OS X Yosemite: How to Assign Your SSL Certificate to Services
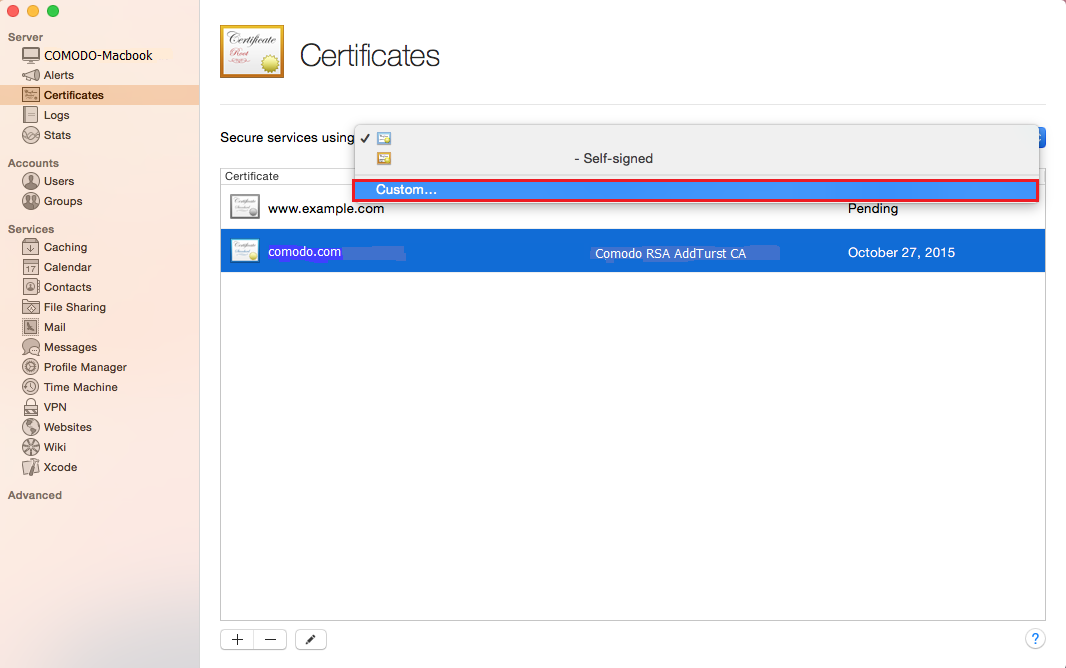
- In the Server App window, under Server, click Certificates.
- On the Certificates page, in the Secure services using drop-down list, select Custom.
- In the Service Certificates window, in the Certificate drop-down list, select your new SSL Certificate for each Service to which you want to assign it.
For example, in the Certificate drop-down list for Websites (Server Website – SSL) select your new SSL Certificate.
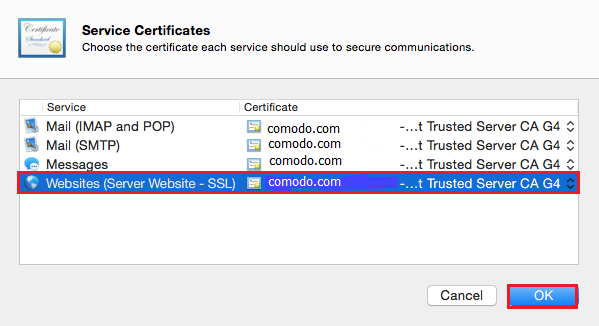
- When you are finished, click OK.
- You have successfully installed, configured, and assigned your SSL Certificate to your respective Services.