How to Install Certificates on Cobalt RaQ4/XTR
This article will go into detail on how to install certificates on Cobalt RaQ4/XTR
Installing the site certificate
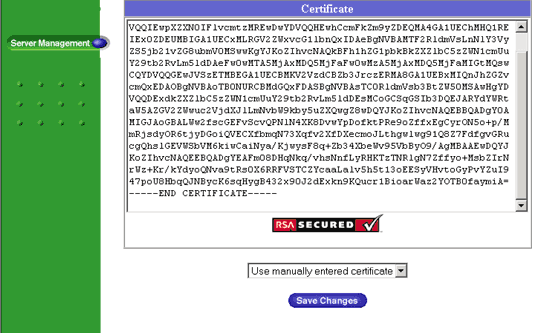
Go to the Server Management screen.
Click the green icon (Wrench for RaQ4, Pencil for XTR) next to the SSL enabled virtual site
Click SSL Settings on the left side.
Copy the entire contents of the site certificate that you received, including
-----BEGIN CERTIFICATE-----
and
-----END CERTIFICATE-----
Paste the new certificate information that you copied into the "Certificate" window.
Select Use manually entered certificate from the pull-down menu at the bottom.
Click Save Changes.

Install the Intermediate Certificate
You will need to install the intermediate certificate in order for browsers to trust your certificate. The intermediate certificate is attached to your email in the zip file and is available for download form the main support section of the website.
The following will require that you access the httpd config file.
In the GlobalSSL Setting in the httpd.conf file, you will need to complete the following:
- Copy the intermediate to the same directory as httpd.conf and name it ca.txt
- Add the following line to the SSL section of the httpd.conf (assuming /etc/httpd/conf is the directory to where you have copied the Intermediate file)
If the line already exists amend it to read the following: SSLCACertificateFile /etc/httpd/conf/ca.txt
Note: If you are using a different location and certificate file names you will need to change the path and filename to reflect the path and file name that you are using.
